Wednesday, April 22, 2009
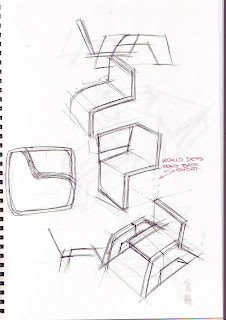
Initial Concept 3
This design is all kinds of awesome! Very simple as it is two exactly the same pieces slotted together. I would really like to pursue this idea however after speaking to the workshop guys they believe it would be too flimsy as too much material is cut away in order for the 2 pieces to slot together. Also angular cuts would need to be made which would be an absolute pain. will try and work around this however!
Concept Model
This is a quick model I made to get an idea of form and to see if the idea would actually work. Overall I am pretty happy with the outcome and am confident that if it were to be built full scale it would support the required 150kg. However this model has also made me realise that the construction technique would need to be changed in order to use the specified 1800x1200mm xanita board.
Concept Development
Sunday, April 19, 2009
Event Evaluation - 100% Design Tokyo
Saturday, April 18, 2009
Wednesday, April 15, 2009
Cardboard Chair Videos
Whilst researching cardboard chairs I came across these videos of chairs that someone made. It shows how easily it can be constructed and deconstructed and how sturdy the chair is when constructed.
Saturday, April 11, 2009
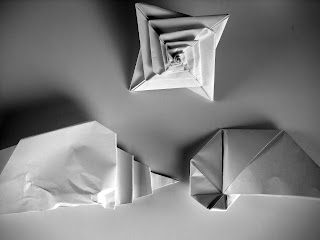
Esquisse Three - 3D Translations
These are my three solutions to this esquisse. I chose to study a sea shell. Each followed the Fibonacci sequence in some way with each new section getting smaller / larger.
SOLUTION 1
This solution incorporated the Fibonacci sequence as each new layer gets proportionately larger as it goes around.
SOLUTION 2
SOLUTION 3
This is by far my favorite solution. Inspired from the textures on shells this solution spirals around and around. Again it incorporates the Fibonacci sequence as each new layer in the spiral gets smaller.
Tuesday, April 7, 2009
Xanita Board Experiment
This is the result I ended up with in by Xanita Board Experiment. The aim of the experiment was to create a box 60x60x60mm. The difficulties encountered when using this material included cutting due to its thickness, the correct measurements on all sides, and cutting the right depths to get the correct bends needed.
The images above show the final box, both in perspective and top view as well as a flat pack image.
Subscribe to:
Posts (Atom)